This post doubles as a tutorial for an...
Everlasting Calendar
Designed and made by Holly May Bruce
You Will Need:
- a stretched canvas approx. 12x16"
- clear pvc, 1metre by 30cm (or as wide as the canvas is
- sewing machine, black thread, walking foot
- white crochet yarn of any kind and a crochet hook to match
- yarn needle and a sharp needle with a hole big enough to fit your yarn too
- one old pillowcase that you wouldn't mind seeing for the rest of your life
- a staple gun
- craft knife
- 45cm of ribbon
- two metal screw-loops, you'll understand what I mean in Step7
- white-board marker
- patience
Slide the pillow case onto the canvas. It should be a nice snug fit. If it's not, then you'll have to add a step in right here and sew it smaller along one side (or get a smaller canvas).
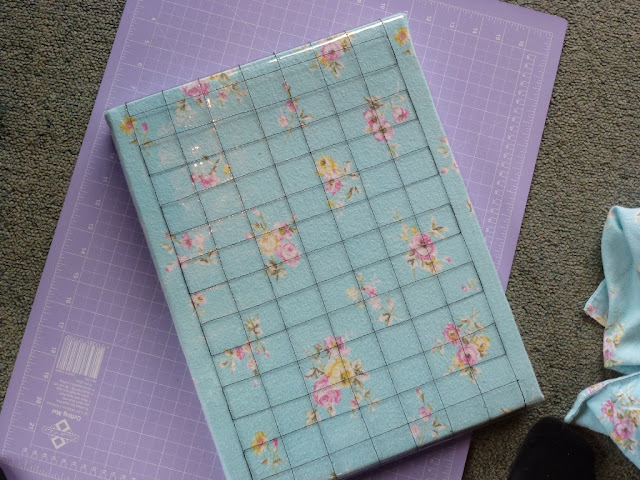
Once it's on and looking good, grab the staple gun and fold in the end that is open and staple it down. Like the pics below.
Step 2.
Cut the pvc to the right length, you want it to wrap all the way around the front and the back of this, kind of like a sleeve. I got my pvc 1metre wide by about 30cm. You'll need it to overlap by about 2-4cm.
The pvc sticks way too easy to rulers and such, but make sure the lines you cut are perfectly straight and at right-angles. Don't cut it too small!
Step 3.
Now it's getting fun! Thread the black cotton in your sewing machine, and if you have a walking-foot put that on. It will save you a LOT of grief.
Measure on a piece of paper first if you're unsure. You want to have 8 vertical and straight as possible lines sewn into the pvc - from on end to the other, the loong way. You could mark a guide-line on your sewing machine with a pencil.
If you don't use a walking foot, try putting some kind of cellotape under the foot you are using so it won't stick to the pvc and make your pretty sewing have loopy loops every now and then. I learnt this the hard way.
Now once the vertical lines have been made, begin sewing your horizontal lines, back and forth and back and forth. When you get to the end, just sew on top of the outside line. You can see it's a little thicker on the sides where I've done that.
Step 4.
This is a little tricky, wrap the pvc around the canvas and stick the two ends together, there should be about 2-4cm overlap.
Carefully slide it off the canvas and sew it together. I was a little picky about this part and joined them only on the vertical lines, there were a lot of little threads for me to tidy up but I think it was worth it.
Step 5.
Crochet! Well, almost, blanket stitch. All the way around with a sharp needle. Here's how I joined the ends - I left them loose and crocheted them in later.
I used quite fine thread, so for this part I doubled it as you can see in the photos.
Step 6.
Crochet! Actually!
Above:
I am using a 2.5mm crochet hook.
Row 1: I went all around the edges with single crochet. Here I've put three single crochets in each blanket-stitch. Whenever you get to a knot in the blanket stitch, simply crochet over it, making sure the yarn ends are covered with crochet. You might only have a bunch of tiny ends to trim off later.
Row 2: Chain 5, slip-stitch in every fourth single crochet. Repeat until the end.
Above:
Joining at the end/start of the 5chains+1slipstitch, I did 3 slip-stitches to make the third round start at in the middle of a loop. See pic above.
Above and below:
Row 3: Make 10x double crochet into next loop, slip stitch into the next. Repeat until you get to the end, finish with a slip stitch and sew in the yarn ends with a yarn needle.
Step 7.
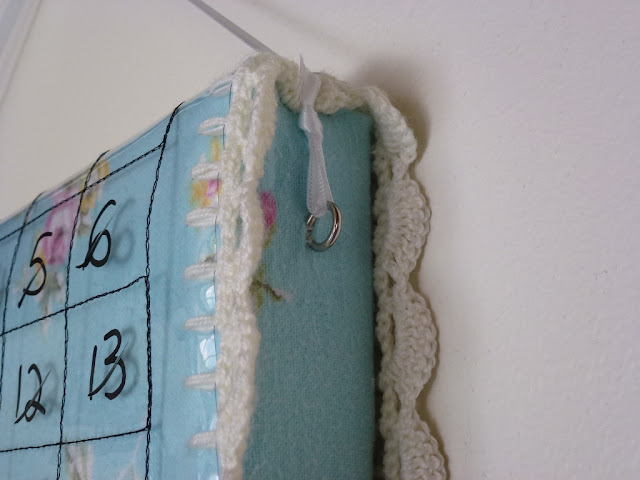
Screw in the screw-loops. I can't think of what these are actually called, but you can see one in the picture below.
I cheated and started the hole with a drill but the wood in the canvas is usually soft enough to manually screw it in. Making sure it's level with the one on the other side.
Step 8.
Tie the ribbon onto the loops, this is the 'hanger'.
Step 9.
Now go nuts with your white board marker!
I made the dates fill up most of the space. Later I found that was ok, but when I added in events and such I'd simply rub it out and put the date in the corner of the square and write in the space.
Tadaaa!
The 'Everlasting' part is where you get to the bottom of the calendar, you'll slide it up the board, exposing more squares underneath and as they get filled up, just wipe if off later with a soft cloth.
You'll never have to buy another calendar ever again. And, when you get tired of 'that' pillowcase, change it.
Note: I used black thread because when the marker is wiped off, it's going to cling into the sewn lines a little.
Enjoy!
Holly


that is really cool. what a great idea
ReplyDelete